
This guide walks you through how to update the branding of the forms to match your own.
After you’ve created your dynamic document template, a form is automatically generated based on the tags you’ve added.
This form will form the basis of your document generation.
It’s client/end user facing so naturally, it needs to match your brand.
Step 1:
When you open the form in the DoxFlowy workflow wizard (the edit forms step), look to the sidebar on the right-hand side of your screen.
There, you’ll see multiple options. Click on the tab labeled ‘Form Settings’.
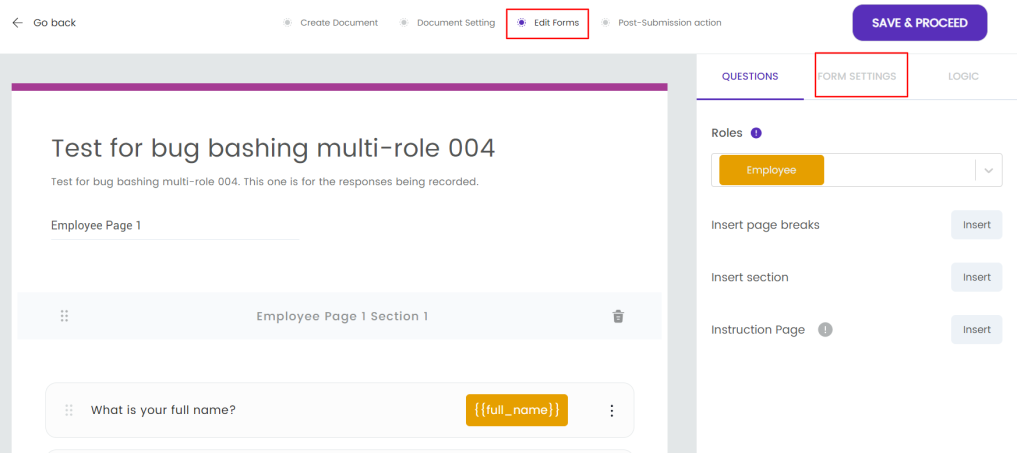
When you click it, you’ll see multiple branding and design options.
Step 2:
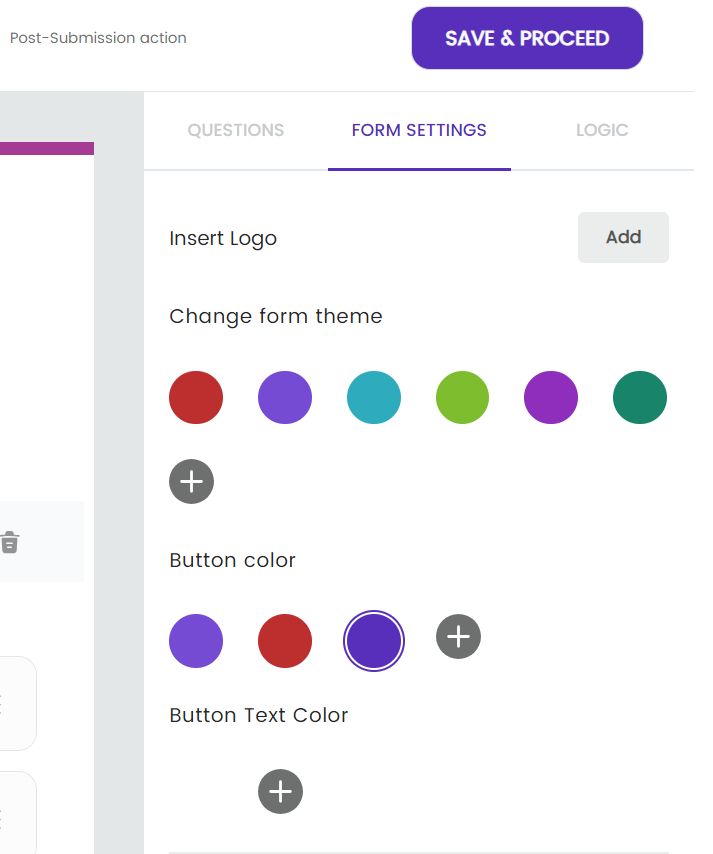
You have control over things like your logo, button colors, the overall colors of the form, and button colors.
Step 3:
In addition to the colors of the form and buttons, you can also add welcome and success screens from this area.
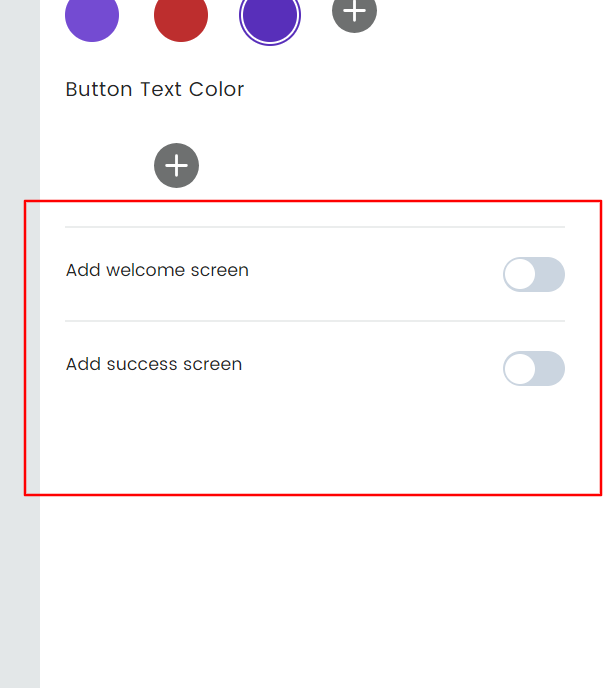
When you toggle the options on or off, you can choose the heading and subheading text of the screens, respectively. You also have control of the button text for both welcome and success.
In addition to the button text, the success screen also allows you to input a custom URL, so when the user clicks on the button, they’ll be taken to a page of your choice.
This is useful if filling out the form and generating the document was just one step in a longer process that happens outside of DoxFlowy.
Note: You can add consent fields to the welcome screen, but that’s handled in the document settings area of the workflow.