
Within DoxFlowy, there are multiple steps in the document automation process.
After you’ve created the initial document and added your tags, you’ll need to choose the settings that will be applied to the document automation workflow.
This guide will walk you through the preview settings and the download settings and how to use them to ensure you’re document is automated properly.
Under preview settings, you have the consent checkbox, show completed document, and allow users to download document.
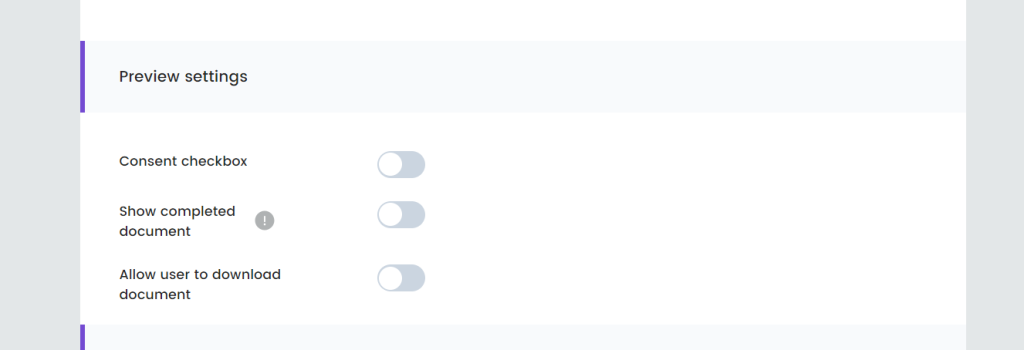
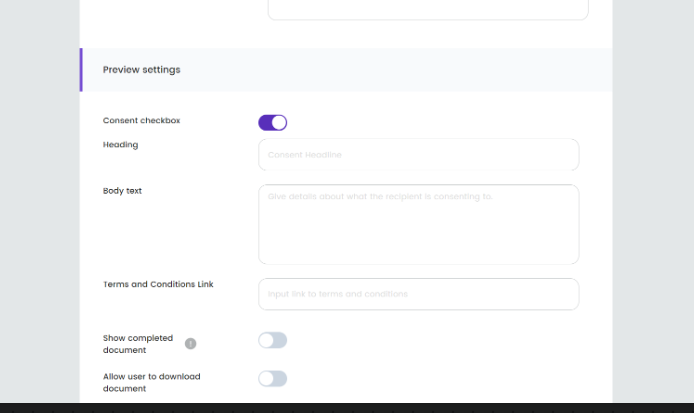
When you turn on the consent checkbox, a screen will appear before the user can fill out the form which is used to automate documents.
Within that screen, you can apply a heading, a message, and even a URL that users can visit before agreeing to the terms and conditions you’ve laid out. This is usually your terms of service or privacy policy.
This option will ensure you’re collecting consent from users. Of course, they can also refuse to give consent and no longer continue with the process.
Next up, the download settings.
You can choose the output file type, the downloaded file name, and numbering.

The output file types are PDF and Word documents.
Since you’ll be using one workflow to automate multiple documents, it’s important to name them properly so you know exatly which document you’re interacting with.
You can pull in tags from the document, such as first name or full name, and use them within the downloaded file name. So, for example, your downloaded file name can appear here as {{full_name}} Lease agreement. When you download it, you’ll see James Allen Lease agreement.
You can use multiple tags when creating the name of the document.
Numbering is not the same thing as page numbering. Numbering is essential for each document generated to be recorded in sequence. A common example of this is invoice numbering. It should count in sequence, and numbering will help you do that.
When you turn this option on, you can choose the starting number, and the documents will be counted in order from there.