
Most tags within DoxFlowy are straightforward.
All you need to do is drop it on the page and you’re good to go.
Checkboxes are different from other types of tags. After adding it to the page, there are multiple options that can be used to customize them.
To add a checkbox to DoxFlowy, first navigate to the document editor and look at the area for default tags.
The checkbox tag is in the bottom right corner.
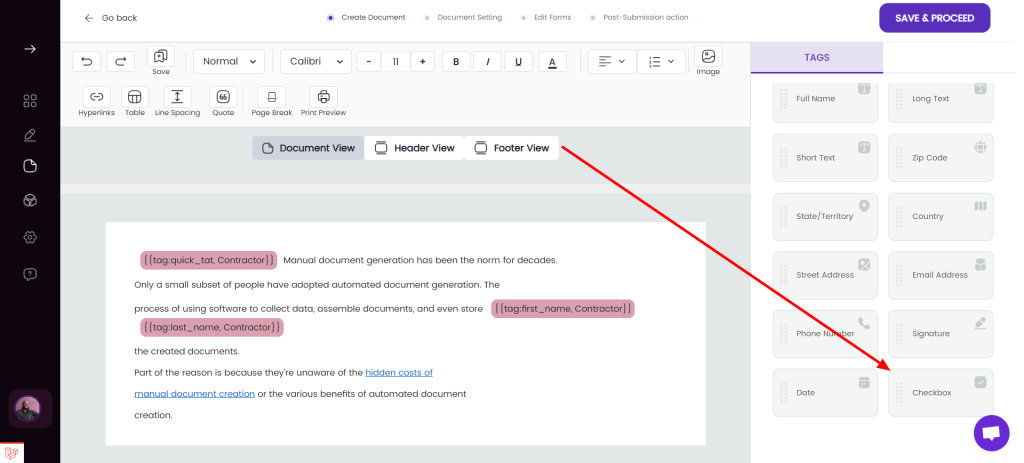
Choose where you want the checkbox tag to be placed and then click on it.
After clicking, a modal will appear on the screen:
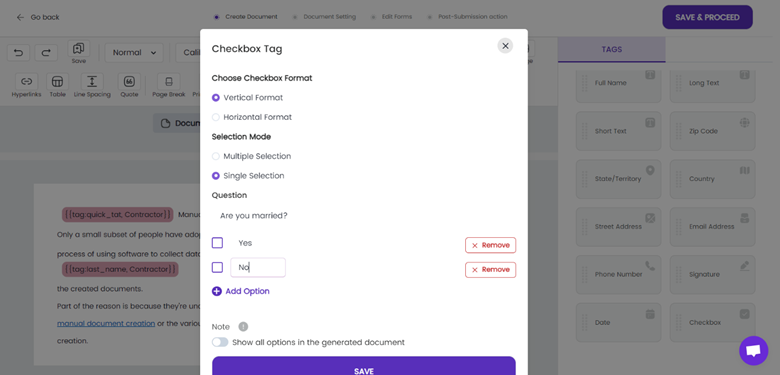
This modal gives you multiple options.
First, you have the checkbox format.
When the vertical format is selected, the options of the checkbox are displayed vertically. That means each option will start on a new line, one after another.
When the horizontal format is selected, each option will proceed on the same line, like you’re writing a normal paragraph.
Under selection mode, single select means that only one option can be selected out of all the options you provide. Multiple selection means that more than one option can be selected out of all the options you provide.
When you save the checkbox, it is displayed in the document with your options and settings.
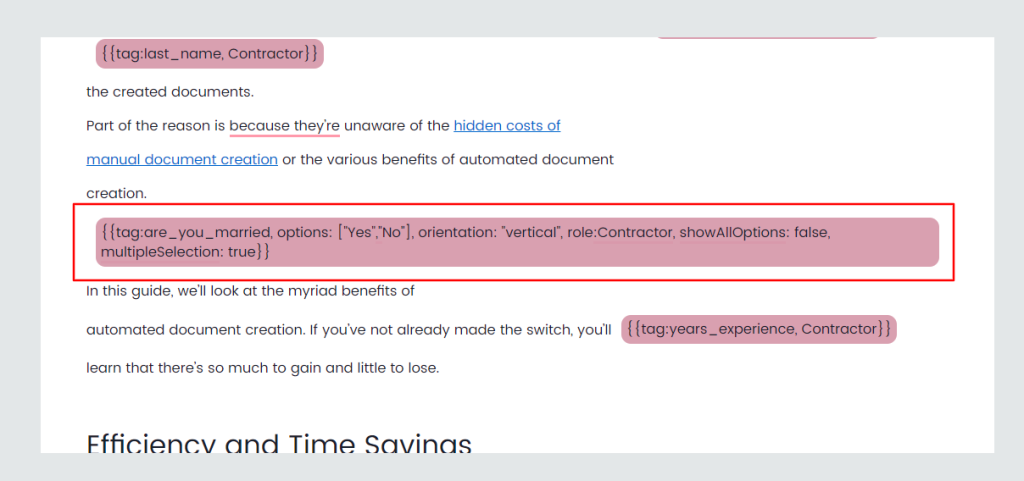
Please DO NOT attempt to change anything within the tag. If you made a mistake, delete the tag and add it again with your corrections.
Note: The checkbox tag ALWAYS starts on a new line.